
In the first tutorial, we set up the Pi with Rasbian, stuck it on the network, with a static IP and enabled SSH for remote log in. That’s all well and good, but there’s no point if it’s doing absolutely nothing. It’s time to get it performing some tasks. Here we are going to set the Pi to act as a DHCP server.
What’s a DHCP Server?
Quite simply, it is a service that keeps track of which computers (more specifically: MAC addresses) have been assigned what IP address on a network. This prevents clashing, where 2 machines could have the same IP address, enabling everything to talk to each seamlessly. Under normal circumstances machines are automatically provided an IP address, this is known as a lease. After the lease has expired, the machine requests the DHCP server assigns another IP address to the computer. This could be the same or different as the one it had before. Most people do not care too much about what IP address their machine has or whether it changes to something else. But, as we noted when setting up Rasbian, a static IP address is useful when you want to easily be able to find the machine, and route particular traffic to it.
At a home level, your ISP provided outer is most likely also a DHCP server. If you’re new to this, you’ll never even realised it existed, or could be done on a separate device to your router.
If The Router Does This, Why Do We Need To Make The Pi Do This?
Because we can. If you’re reading this article I’m assuming you want to learn more about how the inner workings of things work. Also that you want to tinker with Linux to get a broader understanding of the technologies involved.
Last, but not least, administrating this ourselves gives us far more flexibility and power. Many routers do the job, but don’t give much room for us to do anything other than the basics with it. For example, the Sky router I have doesn’t allow changing the name servers (an internet address book, basically) that we perform domain names look ups on, when connecting to the internet. By setting up our own DHCP server, we can change this and use our domain name servers (DNS).
Setting Up
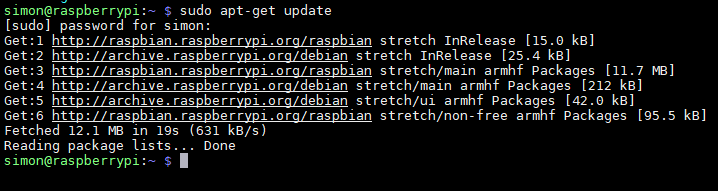
As with most things, getting our DHCP server up and running involves installing a package. We’re going to install ISC DHCP Server on to our Pi. We’ll get the latest package information, with apt-get update, then install the package.
sudo apt-get update
sudo apt-get install isc-dhcp-server
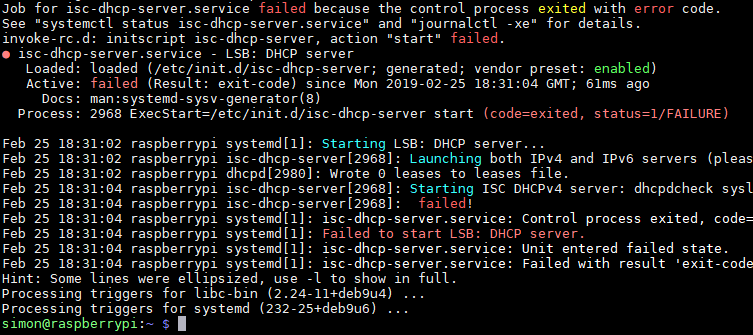
Once the package is installed, Linux attempts to start the service. But it hasn’t been configured yet so you will be greeted with a plethora of errors and failures. Hardly the most reassuring of messages but do not worry about these. We’re going to configure it next.
Configuring
Now to get down to the task of telling the DHCP what it needs to know, about your network, in order to run.
Note: I highly recommend you take a backup of any file you want to make changes to. This makes it easy to restore, should you break anything. To do this do "cp /path/to/file.ext /path/to/file/file.ext.bk". To restore, delete the file you changed with "rm /path/to/file.ext" then rename back file to the original with "mv /path/to/file.ext". Naturally, these commands may require sudo permissions.
If you don’t know your router’s IP address, you can get it by running the following command
netstat -nr

Make a note of the IP address under the Gateway column.
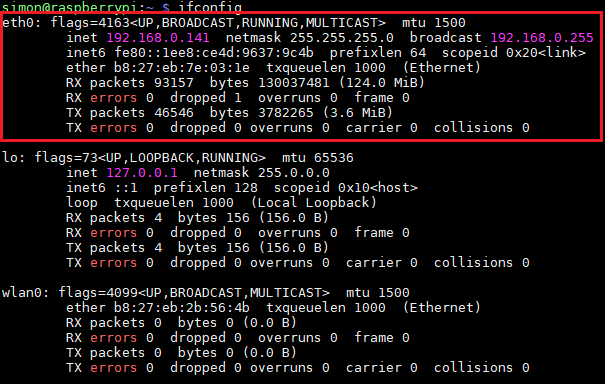
Now you should have set a static IP when setting up Rasbian. If you didn’t, go back to that tutorial and do so. You will need it when running a DHCP server. If you need a refresher on your hardware configuration, use ifconfig. In this tutorial my Pi is running 192.168.0.141.
ifconfig
Now to set the information required for DHCP. Edit the server’s configuration file.
sudo nano /etc/dhcp/dhcpd.conf
Towards the top of the file change the following lines so that your network has its own name. Also change the example domain name servers. In this case I’ve set the name servers to be Cloudflare (1.1.1.1) and Google (8.8.8.8).
#option definitions common to all supported networks…
 option domain-name "devpond.local";
 option domain-name-servers 1.1.1.1, 8.8.8.8;
Next, enter the information that is relevant to your network. This is a very basic example, but will serve our requirements to get up and running quickly.
The subnet is the base IP address that all leases will be set to.
Range sets the start and end addresses that will be leased. Note this example starts at 2. We only ever want the router picking up the first 192.168.0.1 address.
Option routers tells the DHCP where the server that connects us to the rest of the world lives. In this case the router. But this could easily be another server.
subnet 192.168.0.0 netmask 255.255.255.0 {
   range 192.168.0.2 192.168.0.254;
   option routers 192.168.0.1;
 }
Next up we need to configure the protocols we’re going to use. In this instance we are not going to configure IP6 and use IP4 only. I won’t go in to go into the differences between the two protocols here. Suffice to say IP6 allows for far more unique IP addresses than IP4 does. There’s a useful website with more detail, if you wish to know more.
sudo nano /etc/default/isc-dhcp-server
And do the following:
- Uncomment the line DHCPDv4_CONF=/etc/dhcp/dhcpd.conf
- Uncomment the line DHCPDv4_PID=/var/run/dhcpd.pid
- Set the line reading INTERFACESv4=”” to read your network adaptor (i.e INTERFACESv4=”eth0″)
- Comment out the line INTERFACESv6=”” with a # sign.
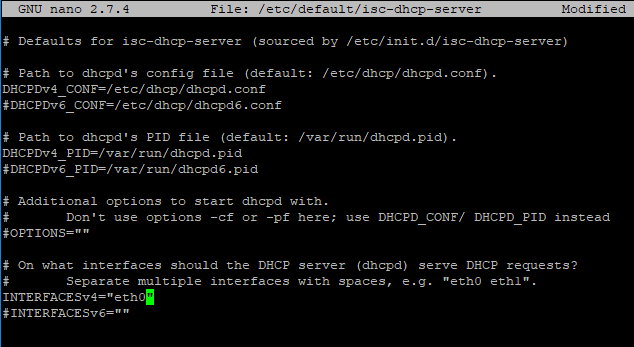
Save the file with Ctrl-X, Y, Enter.
Start The Server
We’re almost there. At this point you can try starting up the service. If all is good, you’ll be back at the command prompt and you should be good to skip to the stage where you switch off DHCP on your router. However, it’s is possible it’ll error due to more ISC quirks.
sudo service isc-dhcp-server stop
sudo service isc-dhcp-server start

If you do get errors, examine journalctl -xe yourself and you’ll hopefully get an idea of what the problem is. It should be that another process is already running. I’m not quite sure why restarting the service doesn’t always hunt down and kill all these processes, but we need to do it manually. Find the PID of the already running process.
ps -A | grep dhcp

That first number is the ID of our rogue process. Time to terminate it. If you have more than one process attributed to dhcp then kill them all.
sudo kill 469
Now try and start the service again.
sudo service isc-dhcp-server start
All being well, you’ll silently return to the command prompt. If you keep getting errors then you’ll need to keep working though the messages in journalctl and try and work out why it keeps failing. Nobody said the Linux world was easy, and there are always unanticipated problems unique to every scenario.
You now have to switch off the DHCP capabilities on your router. Every router is different in this regard, and you’ll need to consult your router’s instructions on how to do this. Once done, your Pi should take over as the network’s DHCP server.
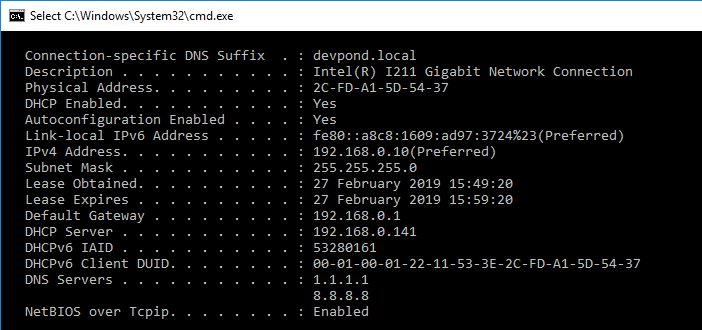
Check The Server Is In Use
Restart your desktop and check your network adaptor settings. If your Pi is now serving the network correctly, you should see its IP address as the DHCP server. You’ll also see the IP addresses we set up to be our name servers and the network name we made, at the top. Your desktop machine should have an IP address in the range we set in the dhcpd.conf file. If it does not, and reads ‘autoconfigured’ you’ve missed something out.
You’re all set.
There is a typo in the suggested command to edit the isc-dhcp-server config
sudo nano /etc/default/ics-dhcp-server
should read:
sudo nano /etc/default/isc-dhcp-server
also consider using journalctl -r to troubleshoot any errors. This showed me that my configured range was bad. Once corrected the service would start
Thanks for the feedback. I’ve amended the typo. 🙂
I wrote this article when I was properly starting to learn Linux. Over the last couple of years I’ve learned a lot more, and took on a DevOps role. I am enjoying finding out things I may not have known about before. This whole website is to help me remember what I’ve done, and hopefully help others, too.
There is a typo in the suggested command to edit the isc-dhcp-server config
sudo nano /etc/default/isc-dhcp-server
should read:
sudo vi /etc/default/isc-dhcp-server
😉
very nice blog btw!
I keep meaning to switch to vim, as my main editor. But my muscle memory is stuck on nano… for now…