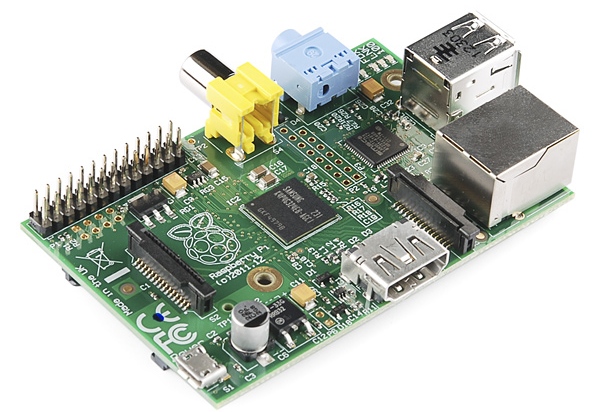
The Raspberry Pi was, and still is, a neat little device. I got one of the first of the v1 Model B boards off the production line, with the full intention of doing so much cool stuff with it. Even though, at the time, I was poor undergraduate the allure of a PC, capable of running Linux, for about £30 (more like £50 once you factor in a case, and power supply) was too great. The initial lead times for quite high, so it was a bit of a wait between purchasing and actually receiving it. And, truth be told, it essentially found life as a media server, running RasbBMC, as I imagine a lot of them did.
Fastforward some 6.5 years and the world has already moved on; smart TVs, streaming services and ‘casting’ from your phone to TV have made a dedicated media streamer far less useful as it once was. Plus, with desktop machines able to run multiple virtual machines, it’s far easier to spin up a VM/Docker container to casually play about with Linux. The Pi has been sadly neglected, gathering dust and grime in some drawer.
However, since my experience with Linux has grown, I’ve granted the Pi a new lease of life. The plan is to let it sit on the home network and can have various tasks delegated to it. More on that in later articles. So, without further ado, let’s get it up and running. The following instructions are for the Raspberry Pi v1, but I can’t see the later models deviating too far from this.
Rasbian Installation
Rasbian is a flavour of Debian, and runs on the Pi’s ARM CPU. This will form the base of our setup. If you ever get stuck with something most solutions, to Linux problems, will work with Rasbian too. For this tutorial, all we’re going to do is get Rasbian installed, and set up SSH so we can connect to the device from any machine.
You will need:
- A Raspberry Pi (obviously). If using a v1/v2 then an Ethernet cable is certainly a requirement. v3 has onboard wireless, though Ethernet is less problematic.
- An SD (or MicroSD for v3) card. 8GB minimum according to NOOBS. 16GB will give you more flexibility for installing packages.
- Keyboard, mouse and monitor
- A PC/Laptop to format an SD card and download Rasbian, and to use SSH.
Now to get the OS installer. NOOBS makes setup extremely simplistic. Simply go to https://www.raspberrypi.org/downloads/noobs/ and download the offline/network install version. You can get NOOBS Lite, which is a much smaller download, but I find it’s less hassle to get everything you need, before you start.
Whilst waiting for NOOBS to download, get the Pi ready. Hook up the keyboard, mouse and monitor to the Pi. If using ethernet, connect the cable to your router (or homeplug, switch, whatever else you might have). Do not plug the power in just yet.
The readme, in the download, contains information on how to get NOOBS on to the SD card. The crux of it is to get a SD card formatting tool, for your operating system, from https://www.sdcard.org/downloads/formatter_4/ then copy the files, from the extracted NOOBS download, to the SD Card. Do all that, then stick the SD card in to the Pi, connect the power, and boot.
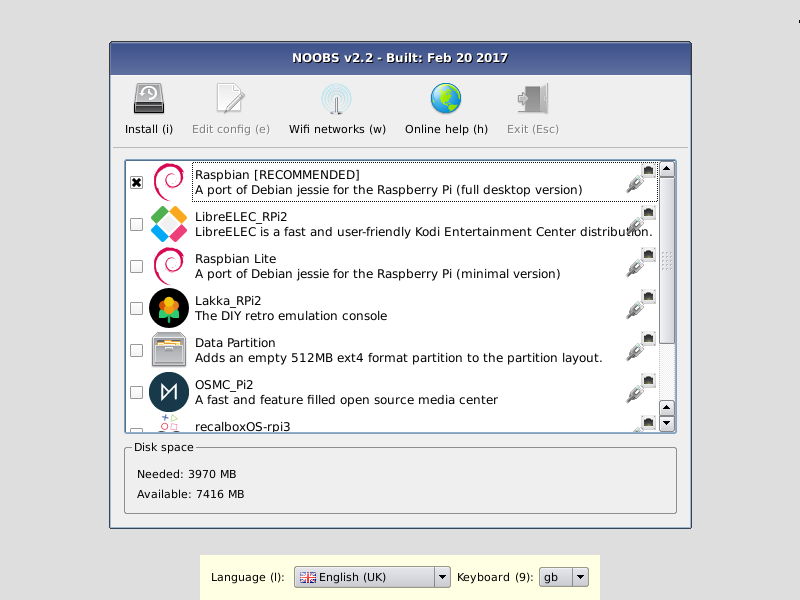
If all goes well, you should be presented with a selection screen. NOOBs default option is to install the desktop version of Rasbian. However, trying to use a desktop is painful, on a v1 Pi and, given the device is going to quietly sit on the network, and we’re going to SSH in to it, we only want the command line option. So choose Rasbian Lite for a command line only version. Then click install and let it do it’s thing. It will tell you when it’s all installed.
Reboot the Pi. You should see it doing its startup thing before being finally given an entirely unsexy login prompt. Welcome to the true Linux experience.
The default user for Rasbian is ‘pi’. Login with that as your username and ‘raspberry’ as the password. Now, you do not want that user to remain on your system; it leaves you open to attacks, since it’s commonly known. So we’re going to remove that and install yourself as the Pi’s new Supreme Leader.
To do that, switch to the root user.
sudo su
Create your new user, where simon would be your own username. You can be me if you wish, but your own name is easier to remember. Also note that any other instances of ‘simon’ in this article should be replaced by your own username.
adduser simon
Hit enter and you’ll be asked to enter and confirm a password for your new user. Do so, making sure you’ll remember it, then enter what details you wish in to the next few prompts (I tend to just enter my full name, and hit enter through the rest).
Add your new user to the sudo usergroup.
usermod -aG sudo simon
This gives you the super powers required. You then test the new user has root powers by typing
su simon
then, to test sudo works
sudo ls /
At this point we log out of root, and do everything under your own login. It’s just best practice, in the Linux world.
exit
You should be back at the log in prompt. If not, and you’re back as the ‘Pi’ login, type exit again. Now log in as your new user. Now we get SSH set up, which allows you to disconnect the keyboard, mouse and monitor from the Pi, and log in to it from any device on the network.
But first, delete the old Pi user.
sudo userdel -r pi
Static IP
You’ll want your Pi to keep it’s assigned IP address, to make it far easier to find from a remote machine. Once logged back in, find your Pi’s IP address by typing
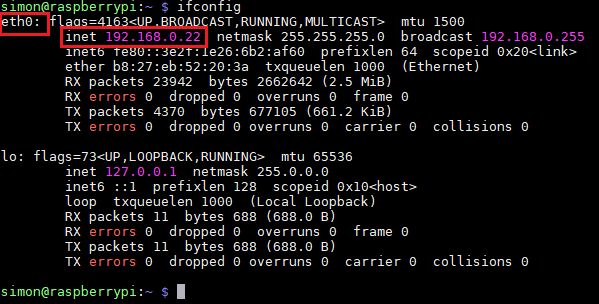
ifconfig
If connected via the Ethernet cable, you will want to make a note of eth0 (I believe, if using wireless, then you will need to check the configuration for wlan0), and the IP address next to the inet line. Mine is 192.168.0.22 but yours will vary. Again, any instances of 192.168.0.22, in the rest of this article, should be replaced by your own Pi’s IP address.
Now edit the /etc/dhcpcd.conf file to include information on the IP address you want to assign to the Pi, and your router’s IP address. Again, this will vary depending on your network setup, so check your ISP’s instructions for finding provided router settings. It is recommended you make a backup of any file you change. This makes it easier to undo any changes that have broken your configuration.
sudo nano /etc/dhcpcd.conf
And add the following, with your info
interface eth0
static ip_address=192.168.0.22/24
static routers=192.168.0.1
static domain_name_servers=192.168.0.1
The interface option will be set as your Ethernet or wireless adaptor name. ip_address is the one you noted earlier, in ifconfig. Routers is the IP address of your ISP router and set domain_name_servers to also be your router’s IP address. Press Ctrl-X to exit the editor. You will be asked to save the file before you go, hit Y then enter.
Setup Remote Access
We’re almost there. Now we need to enable SSH, to allow remote login. We also want the SSH service to be running on every reboot.
sudo systemctl enable ssh
sudo systemctl start ssh
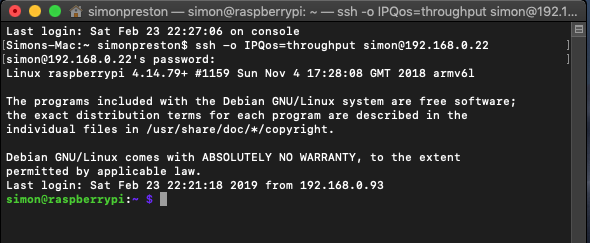
Moment of truth time. We now need to make sure everything works as expected. Load up a terminal application on a different machine. If using the Unix based MacOS X, this has a terminal built in and all you need to do is type
ssh -o IPQoS=throughput simon@192.168.0.22
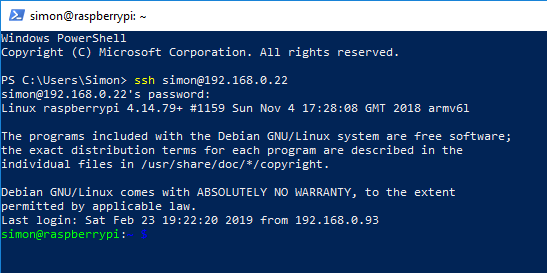
Windows is a little more cumbersome as it doesn’t have a native SSH client. Well, Windows 10 now does, but you may have to install it as an optional feature. Windows Vista/7/8 will take a little more work, and you will need a 3rd party client. However, if you do have built-in SSH available, in Powershell type something like
ssh simon@192.168.0.22
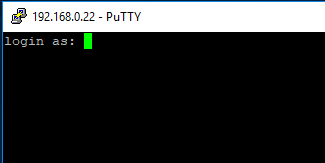
If you are using an earlier version of Windows, then use something like Putty. You’ll have to read the manual on that one. But you can very easily set a shortcut to Putty with the things you’ll need as parameters. Here is a link to get you on your way.
In both cases, you should be greeted with something telling you the authenticity of your host can not be guaranteed, and do you want to continue. Yes, you do. Then enter your password. If successful, you should now have a familiar looking command prompt of your logged in user name followed by @raspberrypi. That’s almost it. However, to be doubly sure, power down the Pi by typing
sudo shutdown now
Give it a moment, then disconnect all the cables, except the one to the router. Then plug the power back in. Give it a minute or so to boot up, then try to SSH in to it again, via the above examples. If all is good, and you can log in, congratulations! We’re all done. Your Pi is up and running and ready for use.