Having a website that can handle encrypted traffic is more important than ever, in this vastly connected world. Billions of transactions per day are carried out across the web, and encrypting your data is another in the fight against data theft. Browsers are also now being set to tell you if the site you are using is secure or not.
Not only that but SEO rankings now favour sites that have https enabled, over their non-encrypted counterparts. So just having it will boost your site’s visibility in searches. If you want traffic, you’ll need SSL. All in all securing the traffic on your site, even a very basic one, is a very good thing.
In this example we’re going to be securing a small website with SSL, allowing for end to end encryption between browser and website. I must warn you now; this is not one for the faint hearted. You will need to set aside several hours of your time, and ensure you have plenty of coffee available. You’re likely to see errors and be prepared to resolve those yourself. Unfortunately, there can be many subtle differences in Linux installations, even in the same distros, as server admins configure things differently. This means what has worked for me, may not for you. But you’re not alone on this. I too had to go through a bucket load of errors getting mine set up. As do many other experienced Linux admins. But it’s all part of the fun. Just don’t take your production site down and you’re golden.
This article assumes more hands-on experience with Linux, than my Pi tutorials.
Before we get going I’ll just say I do take some issue with the whole secure/not secure thing. All HTTPS offers is end-to-end encryption between browser and server This makes it extremely difficult for intercepted traffic to be read. But the way it’s being marketed makes it seem as if HTTPS = trustworthy, to the average web user, which simply isn’t true at all. Any site can get an SSL certificate, trustworthy or not. Likewise, trustworthy sites may not be secured with HTTPS. I wouldn’t suggest you enter your card details in to those sites, and they should be upping their security, if they want your business. I’m simply highlighting that secure and trustworthy are entirely different things.
Buy and activate an SSL certificate
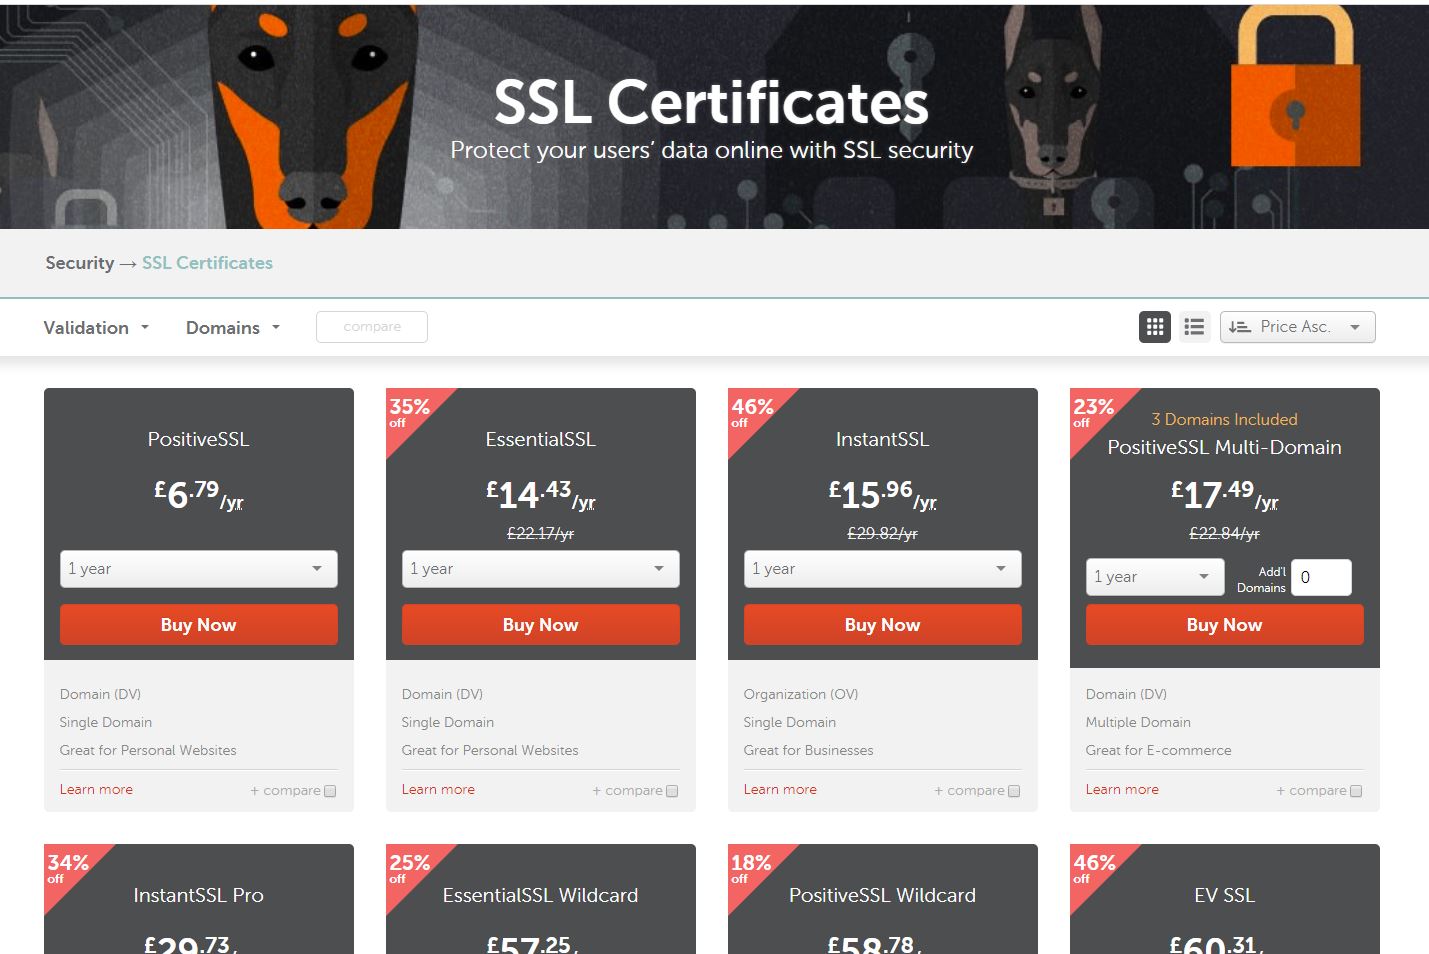
The first thing we’re going to do is get our certificate for our website – this one, as it happens. There are plenty of options out there. Including free ones. For me, Namecheap’s PositiveSSL product, £6.07 a year, for 2 years, at time of writing suits my purposes. A single year is slightly more expensive, but not much. Get whichever you want. I’m lazy and hate renewing things. I also like saving money. If you need something such as wildcarding, you’ll have to splash out a little more but that’s your call. Create an account and purchase your product.
You will now need to activate your certificate. Namecheap already has a guide on doing this, which will go in to more detail than this article. First up, you will need to generate a CSR code.
If using a hosting package, such as one provided by Fasthosts, they should provide tools for this. However, this is a Linux based website and, of course, we’re going to be hosting on our own servers. So this does assume you have already set up a web server, running an http version of the site you want to secure. I won’t be using the Pi, for this article. My server is held in Amazon AWS, which runs a different flavour of Linux and has subtle differences to Rasbian. With that in mind it’s time to go get our hands dirty.
If you are trying to do this via your Pi, it is strongly suggested you log in to your server via a terminal, rather than directly. Not least as this will allow you to copy and paste the contents of the files, we’re going to generate, in to Namecheap. Please do replace all instances of yourdomain with your own site address. 😉
Right. Let’s get our initial request for a certificate up and running. In your terminal type
openssl req -new -newkey rsa:2048 -nodes -keyout www_yourdomain_com.key -out www_yourdomain_com.csr
You will then be asked to fill in some key information. Only the final ‘extra’ attributes can be left blank. Any of the others put ‘NA’ if you do not have anything to put in.
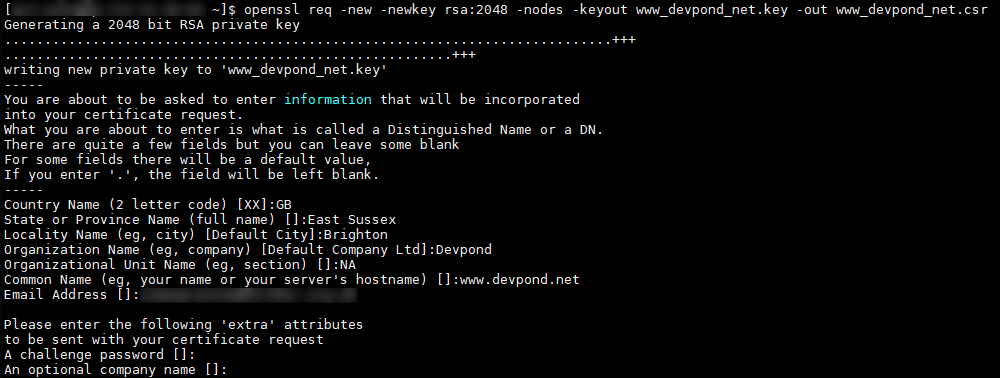
Once done, you’ll be back at the command prompt with little information on if it went well. You can check the files have been created by doing an ‘ls’ command on the folder you are in. The files are simple text files, so you can easily check their contents by doing a ‘cat’ command on them. You’ll see they are full of a lot of nonsensical letters, numbers and other characters. These are essentially the passwords used for SSL. Fear not. You don’t need to remember them, thankfully.

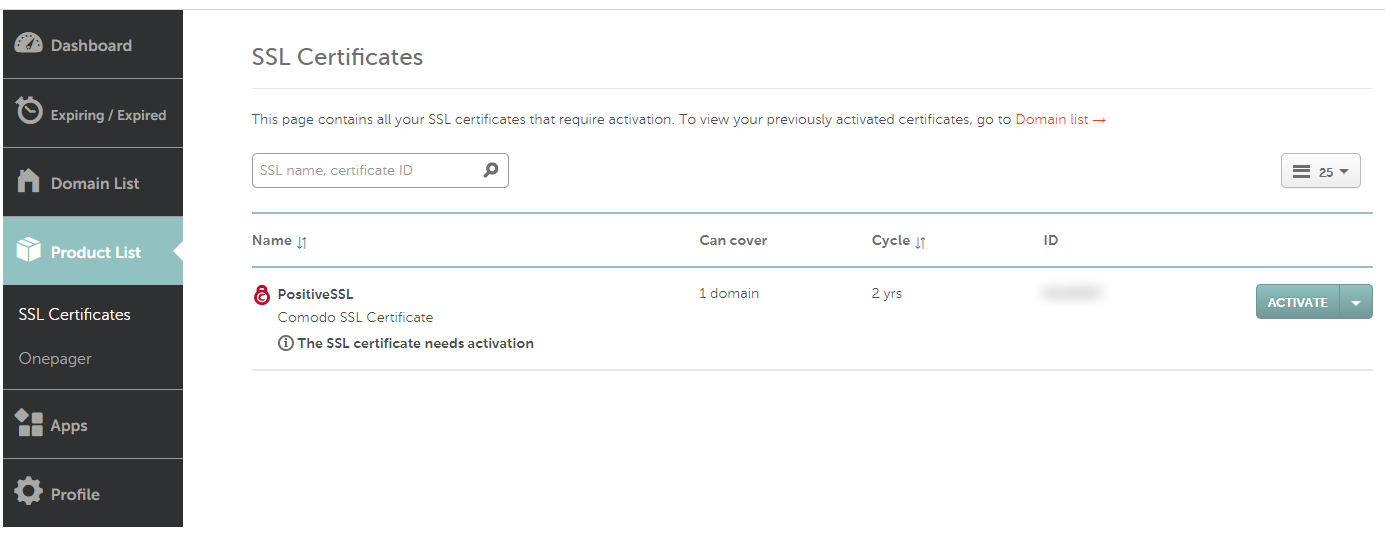
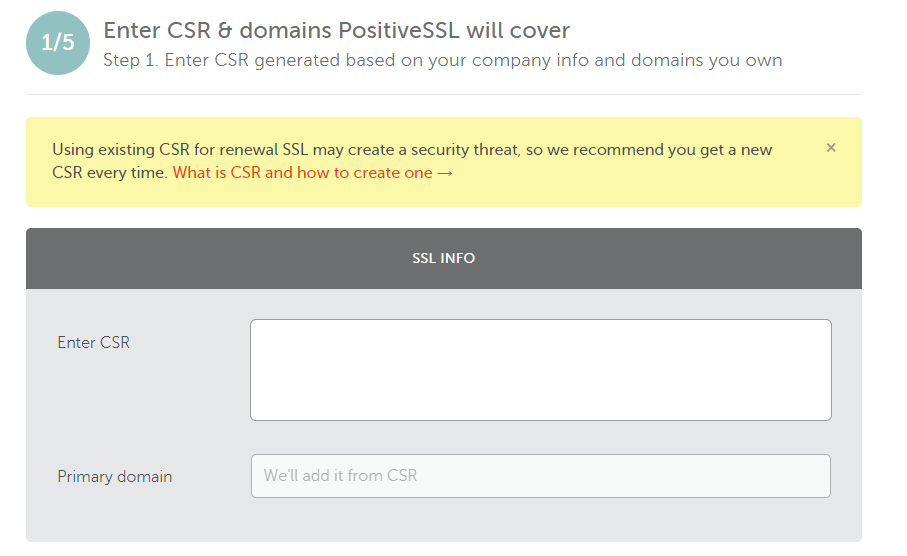
Now to activate the certificate. Go back to your dashboard, in Namecheap, and select ‘Product List’ and then ‘SSL Certificate’
Now copy the entire contents of your new .csr file, including the header and footer, into the Enter CSR box. Namecheap will automatically pick up the Primary domain and stick that in for you.
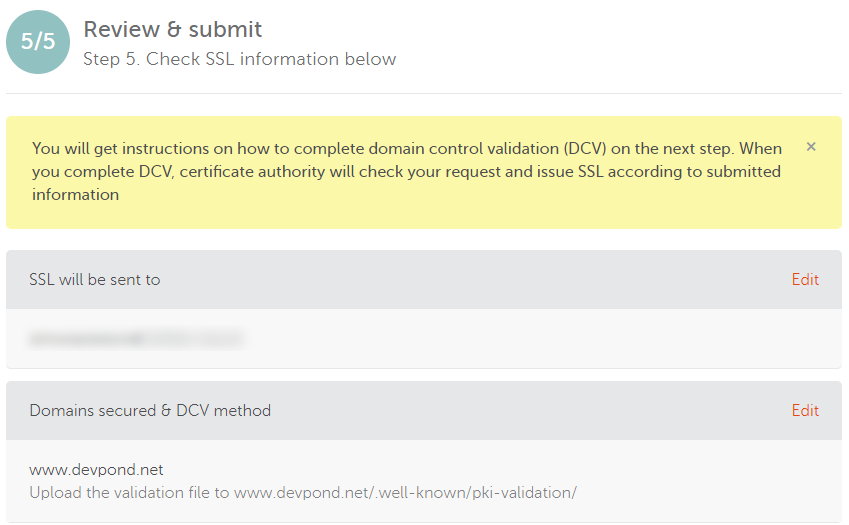
There are some extra steps to complete, but the process is fairly easy to follow. For the DCV step email verification is the easiest method to complete the setup. If you don’t have a mail server installed you can use HTTP or DNS based validation. HTTP involves putting a file on a web server, that Namecheap can see, to prove it is us. We’re going to go with HTTP based verification here. Request that and complete the rest of the process.
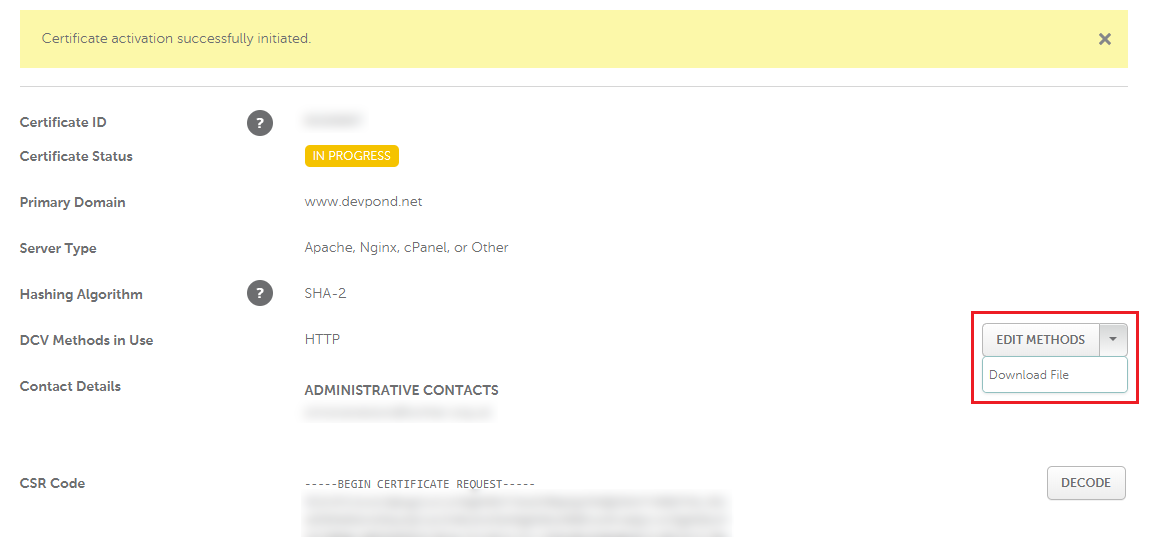
The next page will show you an information box telling you where to go to download the validation file. Click on that link, then be prepared to get very confused when you don’t see anything obvious on where the file is. You need to click on the arrow next to the ‘Edit Methods’ button and then select to download the file to your computer.
We now need to get the activation file on to your website. Back in your terminal change to your website’s root folder and create the required directories with mkdir. The -p parameter will create any parent directories required.
cd /var/www/html
sudo mkdir -p .well-known/pki-validation
At this point, it massively helps if your terminal has a built in file upload or you have FTP set up. I’m not going to go in to setting one of those up now. I shall be uploading the files via my terminal software. You will have to RTFM manual for the various methods to achieve this.
With the file now in the /pki-validation directory you can check this works yourself by going to http://www.yourdomain.com/.well-known/pki-validation/yourfile.txt. You’ll see a line of text that won’t mean too much to you.
All that’s left for you to do now is click ‘Done’ in your Namecheap dashboard and wait for them to get back to you that all is complete. It shouldn’t take long; I went and made a coffee and had the email by the time I got back. Once you have the confirmation email you can go ahead and remove the directories we created above.
ls /var/www/html
sudo rm -rf .well-known
You’ll have an attachment, in the email, which contains crt and ca-bundle files. These need to go on to your web server. Use your terminal or FTP client to upload them to your user directory. You then want to move them to the certs folder.
cd ~
sudo mv yourcafile.ca-bundle /etc/ssl/certs
sudo mv yourcrtfile.crt /etc/ssl/certs
Move the private key, you created earlier in to the private folder.
sudo mkdir /etc/ssl/private
sudo mv www_yourdomain_com.key /etc/ssl/private
Configure SSL traffic on your web server
So that’s the first part done, and we have our very own SSL certificate. However, our Apache server is only configured to listen for none-SSL (port 80) requests. We now need it to start listening for https (port 443) connections.
Apache’s SSL module may not be installed in /user/lib64/httpd/modules. If that is the case then install it using your server’s package manager. In this instance, my server uses yum, rather than apt-get in the Raspberry Pi articles, but the process is very similar.
sudo yum install mod_ssl
Note: If you are only ever hosting a single site, then you may not need to do this next part, as you shouldn't have a separate conf file, for your site, either. If so, you may need to do some changes in the ssl.conf file to set up the server name, and point to the correct crt, ca, key file locations, rather than copy them in to your site's conf file.
Because I am setting the SSL Certificate options inside the site’s own config file (this is useful for multiple sites, hosted on your server) I am going to edit the ssl conf file.
sudo nano /etc/httpd/conf.d/ssl.conf
Copy all the uncommented lines between the following 2 lines:
<VirtualHost _default_:443>

</VirtualHost>
And copy those to a text file on your desktop. Now comment out all the lines between those above lines, and the lines themselves, or delete the whole lot.
Our web server will now be configured to enable this module and setup the SSL Engine
sudo nano /etc/httpd/conf/yoursitesconfig.conf
Create a new virtualhost for port 443 requests. Set up the server name and values as you do for port 80. Copy across the values you copied from ssl.conf file. Your stuff you’ve added to your conf file should look something like this:
<VirtualHost *:443>
    ServerAdmin webmaster@yourdomain.com
    DocumentRoot "/var/www/html"
    ServerName www.yourdomain.com:443
    ServerAlias wwww.yourdomain.com

    SSLEngine On
    SSLProtocol all -SSLv3
    SSLCipherSuite HIGH:MEDIUM:!aNULL:!MD5:!SEED:!IDEA

    SSLCertificateFile "/etc/ssl/certs/yourcrtfile.crt"
    SSLCertificateKeyFile "/etc/ssl/private/www_yourdomain_com.key"
    SSLCACertificateFile "/etc/ssl/certs/yourcabundle.ca-bundle"

    <Files ~ "\.(cgi|shtml|phtml|php3?)$">
        SSLOptions +StdEnvVars
    </Files>
    <Directory "/var/www/cgi-bin">
        SSLOptions +StdEnvVars
    </Directory>

    BrowserMatch "MSIE [2-5]" \
        nokeepalive ssl-unclean-shutdown \
        downgrade-1.0 force-response-1.0

    CustomLog logs/ssl_request_log \
        "%t %h %{SSL_PROTOCOL}x %{SSL_CIPHER}x \"%r\" %b"
</VirtualHost>
Before we restart our server check all looks okay, to Apache, with
sudo apachectl configtest
If any errors pop up, make sure you address these. If you get a ‘Syntax OK’ response then now is the moment of truth. Restart Apache
sudo apachectl stop
sudo apachectl start
If still no errors on startup… you might just have a working ssl encrypted website.If not already you will have to open up port 443 so that your server can accept incoming connections to it. Your firewall may be running on your own server or, if using cloud hosting, you may need to edit some security groups with your provider and make sure your server is set to use those groups.
Now go to your browser, and type in https://www.yourdomain.com. Fingers crossed the site loads first time and you get a lovely message telling you the site is secure, or you see a padlock. Congratulations. You are now an SSL wizard!
Forward all non-secure requests to secure
Now we’ve confirmed our https (port 443) requests are working, we want to alter our configuration so that any none-SSL requests are automatically redirected to the secure site. We’re basically going to gut everything in there, and force any request to go to an equivalent https version.
<VirtualHost *:80>
    ServerName www.yourdomain.com
    RewriteEngine On
    RewriteCond %{HTTPS} !=on
    RewriteRule ^/?(.*) https://%{SERVER_NAME}/$1 [R,L]
</VirtualHost>
Now try any http://www.yourdomain.com address. Even if the page doesn’t exist, you should still see your browser being redirected to a https version.
Do note, that if you have any pages that have hardcoded links to the http versions of pages, images, downloads, etc, it helps to change those so they point to the https link.
And that’s it! Time to crack open a beer.
Note: I am not affiliated in any way, shape or form to the products I have linked to or used in this article. I've chosen what I think works best for my own personal circumstances and suggest things I have tried out myself.